We all know that you don't put something hot down on a wood finish. It'll damage it for sure, but I have some tips where a little heat will go a long way toward solving some household wood problems.
1. We all know that you don't put something hot down on a wood finish. It'll damage it for sure, but I have some tips where a little heat will go a long way toward solving some household wood problems.
2. If you're building or repairing something and using a wooden dowel, put it on a cookie sheet and heat it in the oven for a few minutes.
3. The heat will remove any moisture from the wood so that once it's in place it will absorb glues and stains and expand for a super snug fit!
4. If you have a door or a window that is hopelessly stuck, grab your hairdryer.
5. Set the dryer to high and aim it at the sticky spots, this will shrink the wood slightly so that you're able to open and close it easily.
6. A little tip, once you've got it open, use the stub of an old candle to lubricate the sticky parts.
7. If you need to wax a piece of furniture, grab that hairdryer again, warm the surface before you start and the wax will spread on easily and absorb into the surface better than a room temperature piece.
Just a few ways where heat and wood might not be such a bad combination! I'm Mrs. Fixit and it's just that simple!

Showing posts with label glue. Show all posts
Showing posts with label glue. Show all posts
Wednesday, March 2, 2011

Monday, February 28, 2011
Glue
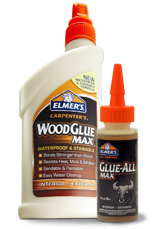
Looking for some easy ways to use glue for your projects? Here are the answers you need.
1. If you have to glue a joint together and don't want the glue squishing all over, lay the pieces where they need to be and put some tape over the seam. Then, use a utility knife to cut a slit in the tape along the joint. Glue the project. When you clamp it, you can easily wipe the glue off of the tape, and when it has dried, peel the tape off and you'll have a nice clean seam.
2. To get glue out of a corner joint, flatten out the end of a drinking straw. The small tool will fit easily into those joints and the glue is pushed up inside the straw and out of the way.
3. If your glue has dried up in the bottle, add a few drops of white vinegar to the bottle and stir. It will soften it up in no time.
4. If you have ever been in the middle of a project and the glue has taken forever to get to the top of the bottle, here's a tip for you... drill several holes an inch or two apart along the length of a scrap wood block. You can store your glue bottles upside down in the holes so that the glue is always at the tip and ready to go.
Friday, December 24, 2010
Flour Power
Flour's used for all sorts of recipes, but I have some uses that go beyond cookies and casseroles.
1. Store flour in a grated cheese shaker, it's perfect for dusting surfaces but it also an easy way to keep flour on hand to soak up grease spills or douse grease fires. Simply sprinkle the flour over the splatters or flames for a quick solution!
2. Mix together equal parts of flour, salt and vinegar to make a paste that will quickly clean tarnish from household brass and copper. Simply spread the mixture onto the metal and then buff it to a shine.
3. Squeeze some flour through a squirt bottle onto the back of pantry shelves, and pests won't walk through the flour, which will keep your food safe!
4. If your child is out of glue and you need to get a school project finished, bring a half a cup of flour and a cup and a half of cold water to a boil and simmer it until it's thick and smooth. Transfer to an airtight container and allow it to cool to room temperature. Use a paintbrush or cotton swab to apply the glue to the project!
5. Clean playing cards by putting them in a paper bag with some flour. Then just seal and shake. Dump them out onto a towel and they'll be grime free!
1. Store flour in a grated cheese shaker, it's perfect for dusting surfaces but it also an easy way to keep flour on hand to soak up grease spills or douse grease fires. Simply sprinkle the flour over the splatters or flames for a quick solution!
2. Mix together equal parts of flour, salt and vinegar to make a paste that will quickly clean tarnish from household brass and copper. Simply spread the mixture onto the metal and then buff it to a shine.
3. Squeeze some flour through a squirt bottle onto the back of pantry shelves, and pests won't walk through the flour, which will keep your food safe!
4. If your child is out of glue and you need to get a school project finished, bring a half a cup of flour and a cup and a half of cold water to a boil and simmer it until it's thick and smooth. Transfer to an airtight container and allow it to cool to room temperature. Use a paintbrush or cotton swab to apply the glue to the project!
5. Clean playing cards by putting them in a paper bag with some flour. Then just seal and shake. Dump them out onto a towel and they'll be grime free!
Thursday, September 9, 2010
Blistered Veneer
Think you need to resort to runners or doilies for blistered veneer well think again it's as easy to fix as ironing a shirt!
1. Small blisters can be fixed with heat and an iron is the ideal tool! It will reactivate the glue and settle the blister. Cover the damage with a piece of flat, smooth cardboard. Lay a hand towel over the cardboard then press a hot iron on the towel. Make sure the iron isn't overlapping the side of the cardboard or you'll cause more problems! Hold the dry iron in place for a few seconds and then check to see if the blister is flattening, if not repeat it until it does. Watch your fingers cause the cardboard can get pretty hot.
2. How about a bigger blister? If it's not slit down the middle already use a utility knife to make a cut down the center along the grain. Gently scrape out any old glue without causing more damage. Use a toothpick or a cotton swab to put a little wood glue under the blister, then press the two sides together smoothing toward the center of the damage. Then repeat the process that you used for the smaller blister to flatten it. If the sides start to overlap, just grab a utility knife to cut off any excess to get a nice smooth seam .
It's just that simple!
1. Small blisters can be fixed with heat and an iron is the ideal tool! It will reactivate the glue and settle the blister. Cover the damage with a piece of flat, smooth cardboard. Lay a hand towel over the cardboard then press a hot iron on the towel. Make sure the iron isn't overlapping the side of the cardboard or you'll cause more problems! Hold the dry iron in place for a few seconds and then check to see if the blister is flattening, if not repeat it until it does. Watch your fingers cause the cardboard can get pretty hot.
2. How about a bigger blister? If it's not slit down the middle already use a utility knife to make a cut down the center along the grain. Gently scrape out any old glue without causing more damage. Use a toothpick or a cotton swab to put a little wood glue under the blister, then press the two sides together smoothing toward the center of the damage. Then repeat the process that you used for the smaller blister to flatten it. If the sides start to overlap, just grab a utility knife to cut off any excess to get a nice smooth seam .
It's just that simple!
Subscribe to:
Posts (Atom)