Thursday, February 28, 2013

Candy Stains


Kids love candy, but let’s face it; it can make a big mess! So how do you get rid of those stains? Well here’s how.
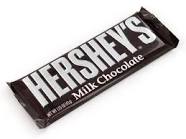
 
Chocolate.  short of dressing your kids in chocolate brown odds are if they eat chocolate they are  going to end up with stains, well, don’t worry, everyone has the best stain fighter for chocolate and you probably don’t even realize it!  Plain old dish soap applied directly to chocolate stains will remove them in short order – even older stains.  Rub it into the fabric and then launder in cold water!

Lollipops are a sticky mess, but luckily are water soluble. So just run hot water over the stickiness to dissolve the sugars and

Remove the film.  If there is a colored stain left behind, rub white shaving cream onto the stain with a toothbrush and then launder. 

The warm water will also help loosen lollipops and hard candy that are stuck to household surfaces.

How about gum –the worst of the candied messes! Really the best line of defense is to dissolve the gum.  Lubricating oil will dissolve the stickiness and loosen the gum. 

Once you’ve removed it, pull that dish soap back out to break up the oil residue, and then launder it as directed!  Taming the candy stains!  I’m Mrs. Fixit and it’s Just that Simple.


Faux Oil Paintings? Yes!

Oil paintings can add a touch of elegance to your home, but they can be pretty pricey, so what do yaw do?

Well you can “paint” your own.  Or rather faux paint your own. I’ll show you how!

Part of the beauty of an oil painting is the way that the brush strokes catch the light and give the painting depth. So look for recreating the brush strokes on an art print!

Pick out a nice quality print, poster, map or even calendar page, beyond the print you’ll need some gesso that you can pick up at any craft store or some water based polyurethane and some brushes. 

Start by tacking your art work to a flat surface so it doesn’t move around while you’re working.

Then start by adding brush strokes to the whole print. A cross hatch motion will give you the depth that you want. It goes on thick and white but it dries clear.

Let it dry a little and then go back with a few different sized brushes, and add some flourishes where the painter might have highlighted something’s like fruit or flowers.

Once you’re happy with your embellishments, let it dry completely and then frame the piece. 

I’m going to let these dry. But this is one that I did earlier and notices the brush strokes it looks like a real oil painting. For a fraction of the cost. I’m Mrs. Fixit and it’s just that simple.

Morning Madness


I don’t know about your house, but mornings around here are solo hectic. But if you take a little time to “prep” it can be a lot less stressful.

Take an hour on Sunday and pull together the kids school clothes for the week.  From shirts to socks- find, iron and lay them out.

This way you’ll know if there’s anything that needs to be washed and there’s no yelling – mom, dad I can’t find any socks!

Have a place near the door to keep backpacks, shoes, boots, coats, and hats, whatever everyone needs.  This way when you’re trying to get out the door in the morning and everyone’s rushing around you don’t have People looking for their stuff!

You should also keep your keys and bag or briefcase in the same space. Remember kids learn what they see!

 Every night, while you’re making dinner, pack the kid’s lunches or put lunch money in their backpack another way to cut out of the morning chaos.

You can also take the downtime in cooking to sort papers from school, fill out permission slips or check homework.   

After the kids are in bed, take ten to twenty minutes or so and walk around picking up clutter, this way when you get up in the morning you won’t be starting your day by walking into a big mess and it will make your day alot calmer!  I’m Mrs. Fixit and it’s just that simple.

Reuse Projects

Some of my favorite projects to tackle are those where I take something that was headed for the dumpster and make something new out of it!  If you have any of those projects that you would like to share - please let me know I would love to share them on the blog and facebook!  Go fixits!

Let some Light In


Did you know that light affects your mood and well being?  If you or your family has winter drag, check your lights, you may be able to help.

First and foremost, open the blinds during the day.  We all need sunlight to be productive, so let the sun shine in.  Painting woodwork and moldings a shade of white also brightens a room because light bounces off of the whites.

If you have rooms without a lot of windows, or you just don’t like opening the blinds, brighten the inside light, there are all sorts of light bulbs that you can buy, to brighten a room choose a crisp sunlight type of bulb.  The brighter light will simulate sunlight and trick your mind.

Mirrored accents help too. These accents will bounce the light that you have making rooms seem brighter than they actually are.

Brighten dark corners, dark pockets take light out of the rest of the room, if you have accent lights in those corners you’ll find that rooms are brighter.

A couple of steps to brighten your home and make you more productive.  I’m Mrs. Fixit and it’s just that simple.


Mirrors


Sure mirrors can help you with your hair and make-up; but did you know they can help brighten and decorate your home too?

If you’re having a dinner party, use a long mirror as a runner on a table top, add candles, flowers, and what ever you’d like and then turn on the lights. 

 The mirror will reflect the overhead lights and the candle light adding sparkle to the whole room.

Mirrors are an inexpensive substitute for art.  A large mirror costs a fraction of what you’d pay for a large painting or picture and it fills the space and adds depth to a room.

Along those same lines you can group several smaller mirrors together to create a really interesting display.

you can also use mirrors to help make home repairs, a hand mirror and a flashlight will let you see problems in hard to see spaces so you know what you need to fix and how you’re going to get there.

Don’t have a hand mirror? Try a make-up compact.  Its “compact” size will reach right where you need it!

That’s it for now, I’ll let you reflect on these ideas for mirrors, I’M Mrs. Fixit and it’s just that simple

Color Palette


Whether you’re thinking of painting or wallpapering you still need to think about the colors and flow from room to room. Well it could be a daunting task but I have some ideas to help you out.

 When you’re looking for a jumping off point for a color palette, look around your house, odds are that you have favorite items that you can take your color cues from, match your paint chips right from the inspirational items and you’re ready to go!

Next, think about flow, if you can see from one room into another you need to take into account how those colors look next to each other.  If you can see into two rooms, think about both of them!

Once you start choosing paint colors or wallpaper, staple sample chips

Together so that you can easily take the whole palette with you if you need to shop for accents or fabrics. 

Making this palette can also help you to better visualize how your colors will look together.

 These little prep steps can really help make the whole painting and decorating process a lot less stressful.  I’m Mrs. Fixit and it’s just that simple. 

Can It!


Can it be done?  Can we find alternative uses to these empty tin cans?  Of course we can!   

First off – make sure that if you’re re-using a can that you used a can opener to get into, use a sturdy pair of pliers to crimps the outside edge of the can, and this will press down any sharp edges so you won’t risk a cut.

 A big coffee can near your stove top is the perfect spot to corral frequently used cooking utensils.

Use a smaller coffee can to stash cash and valuables, and then hide it in the back of the pantry!

 Line up cans on a desk, craft table or a workbench to store everything from pencils to screwdrivers. Several tin cans lined up across a window sill can make for a cute herb garden.

 And if you need to shampoo a carpet, slip some tin cans under the feet of the furniture to protect those feet from water and shampoos!

 If you need to put two card tables together for a party, slip the touching feet in a can to keep the tables from coming apart.

 And speaking of parties put votive candles inside tin cans and lines them up outside your house to illuminate the walkway.  The high sides of the cans will protect the flame from the wind.


Can do tips to help you out around your home!  I’M Mrs. Fixit and it’s just that simple


Wainscoting means different things to different people.  Traditionally it means wood paneling on the lower part of the wall that can be really pricey to have

Installed.  I have a method to give you the same look without the price tag.

I am going to make boxes on the wall out of this simple wood trim and then paint the whole area with one paint color to make it appear as though the entire wall is covered in wood. 

Measure the area and determine the size of the “panel” boxes that you want to create, and then use a miter box to cut all of the pieces to size.

For more information on mitering check out my website.
 
Once your peices are cut, sand down and rough edges.

Use an adhesive on the back of each peice to help hold it in place, and then tack along the length of the molding with small brads. A level will keep you in line while you're working.
 
When you’re finished, fill the nail holes with some spackle and then let it dry.

Finally paint the entire area, molding and wall with a paint that is suitable for woodwork. If mitering and cutting isn’t your thing, you can find pre-made molding boxes at your local home improvement center, just adhere them to the wall and paint, I’m Mrs. Fixit and it’s just that simple. 

Clothing Care


To keep clothes looking their best they need care beyond cleaning.

If your clothes have pilling on the fabric and you don’t have one of those fuzz removers, grab a pumice stone.  Run the stone in one direction over the pills, it will grab them and gently pull them off the fabric.

No pumice, no problem, use an emery board or the hook side of a piece of Velcro to remove those pills.  Always work in one direction so that you don’t damage the fabric.

If you left a tissue in your pocket and your clothes come out of the wash covered in lint run them through again, and rather than using laundry soap use a cup of white vinegar in its place, it will release the lint from the fabric and your clothes will look like new again.

 If you’re dealing with regular lint, try the loop side of the Velcro you used for the pills.  The soft nap will grab onto the lint.

You could also use a vegetable or fingernail brush to remove that lint.

Some easy ways to keep your clothes looking their best. I’m Mrs. Fixit and it’s just that simple!

Sandpaper!


Sandpaper is a handy tool outside the work shop, grab some.

If you have some stubborn grout stains fold a piece of sandpaper in half

So that there is a crisp edge, then carefully run the sandpaper along the grout line. 

The grit will remove the stains.  Just be careful not to scratch the surrounding tile while you’re working.

 If the soles of your new shoes are a little slick, you can stop yourself from slipping and sliding by roughing up the soles with a little sandpaper.  This is especially handy if you’re going to be dancing on a slick floor.

And speaking of shoes, a little sandpaper can help revive the nap and remove some stains of a pair of suede shoes.  Very gently scuff the sandpaper over the area.

If your sewing needle keeps snagging your fabric run it through a piece of sandpaper to remove any little burrs and sharpen it up.

The same is true of scissors, cut through folded sandpaper, or for utility knives, hold the blade at an angle and run it over the paper working in one direction.

Just a few easy ways to bring sandpaper out of the toolbox.

I’m Mrs. Fixit and it’s just that simple

Alternative Uses for bed Sheets


Bed sheets aren’t just for a cozy night’s rest anymore, I have some alternative uses to bed sheets so gather them up.
 
If you have a closet where you store out of season or seldom worn clothes they can get dusty.  The solution, simply drape a flat sheet over all of the clothes and the closet rod. 

You can lift up the sheet if you need to access the clothes, but any dust will settle on the sheet!

A flat bed sheet and some drapery clips make a super easy no-sew window treatment!  As a bonus, it makes it easy to coordinate your bedding and windows.

You could also cut up one of those sheets to make matching throw pillows or lampshades.

 The next time your favorite store has a big bedding sale, stock up on some flat sheets that match your dining room décor, the sheets are perfect for building up and layering table’s capes.

 If you have a lightweight bedspread and you find that your blankets show through the spread, simply layer a flat sheet in a coordinating color over the blankets under the spread, it will block the color from showing through.

 Some simple ideas for re-using bed sheets, I’m Mrs. Fixit and it’s just that simple. 


Leather Care


A lovely piece of leather furniture is a beautiful addition to any home, caring for it is pretty straightforward, I’ll show you how.

During your weekly cleaning routine, wipe leather with a clean, dry cloth.  Micro fiber is a great choice because it grabs dust and lint rather than just moving it.

Place leather furniture at least a couple of feet from any heat source, like a radiator or fireplace.  Too much heat will dry out leather and make it brittle.

 You should also keep leather out of direct sunlight; if your room is sunny make sure you use drapes or blinds to keep the suns rays off of the furniture to prevent fading and drying.
 
For spills on your leather furniture, use a barely damp cloth to clean it away and then buff the area with a clean dry cloth to be sure the stain and moisture are gone. 

 Wondering if your leather has a protective finish on it?  Find an inconspicuous spot and put a couple of drops of water on it, if the water is absorbed you should check the care labels to see if you can seal the leather with a protective repellant.

Along those same lines a good leather conditioner will protect the furniture and buff out small scuffs and scratches from your leather, use it every six months or so to keep your leather looking its best.  I’m Mrs. Fixit and it’s just that simple

Don't forget to LIKE Mrs. FIXIT on Facebook!

Mrs. FIXIT's Official Facebook Page

Tuesday, February 19, 2013

Twist Ties


Saving even the smallest things can really come in handy around the house when you need them.  I have some alternative uses for twist ties!

Tip 1:    Use twist ties to manage the wires under your desk or behind your media equipment!

Tip 2:   If you lose the screw to your eyeglasses, peel the paper off of a twist tie, the little wire inside is the perfect fit for the hole until you can get the glasses repaired.

Tip 3:   If you’re worried about your suitcase zipper coming undone on a trip, thread a twist tie through the holes for a makeshift luggage latch.

Tip 4:  A twist tie can make a handy zipper pull when the zip tag disappears!

Tip 5:  In a pinch, use a twist tie for a hangar on the back of a wreath.  

Tip 6:  Twist ties are also helpful in the garden.  Use them to secure a climbing plant to a garden structure or trellis while training the vines. 
They will also secure small plants to their stakes when a little extra support is needed.

Tip 7: Finally, a handy bit of trivia.  If you’re looking for the freshest bread at the grocery store check the twist ties.  Monday is blue, Tuesday green, Thursday red, Friday white and Saturday yellow! 

That about ties it up! I’m Mrs. Fixit and it’s just that simple!

Use it Again


When something is no longer useful for its original intention, take another look, because it might fill another need.

Tip 1:  Old game boards make great lap desks for paying bills when you’re watching television, or for the kids to color on during a long car trip.

Tip 2:   Refill plastic bottles about three quarters of the way with water and store them in your freezer.  They make great cold packs for picnics and tailgates as well as a contoured ice pack for sore knees or backs.

Tip 3:    Way too many golf tees?  Take a scrap of wood and screw small holes about every inch, half near the top of the board, half near the bottom in a zig zag formation.  Then tap your golf tees into place for a stylish tie or belt rack.

Tip 4:   Keep old candle stubs around for waxing sticky drawers and windows and for lighting fires in the fireplace without scorching your fingers.

Tip 5:  Winter tights that have passed their prime are perfect for filling with rice or lentils and putting at the base of a door to keep heat or cooled air inside!

These are just a few easy ways to re-use household items. I’m Mrs. Fixit and its just that simple! 

Puppy Power


A puppy is a special addition to any home and needs nurturing and care. I have some tips to make your home safe and sound for your new friend.

Tip 1:   Kennels will send a puppy with a blanket or a toy to remind them of something familiar when moving into a new home. 

Tip 2:     In the nights before you bring your puppy home, sleep with a white bath towel.  Put the towel in the crate with the puppy when you go to bed to help her get used to being close to you, and since it’s white, you can easily bleach it when needed.

Tip 3:   If your puppy whines when you put it in for the night try covering the top and front of the crate with a sheet.  This will train the dog to know that when the sheet is up it is time for bed.

Tip 4:    Think of your new puppy like a small child, curious.  Put child safety latches on cupboards where you store chemicals and cleaners, put up a child safety gate to keep the puppy away from stairs, and pick up any knick knacks and items that will fit into their mouth that they could choke on.  Don’t forget to keep toilet seats down and bathroom doors closed to prevent accidental drowning.

Tip 5:     If your new puppy has an accident, clean it with warm soapy water and then spray it down with some white vinegar.  Once it’s dry, sprinkle some baking soda on it and leave it overnight then vacuum it up in the morning.

Easy care tips for your new best friend. I’m Mrs. Fixit and its just that simple! 

Money Matters


Hey buddy can you spare a dime?  A nickel? Quarter? I have some quirky uses for money that give new meaning to the phrase, make your money work for you!

Tip 1:    Use a quarter to open a paint can.  It’s the perfect thickness, it’s a handy size to grip and you won’t damage the can.

Tip 2:   A dime is thin enough to fit most flat screw heads.  Slip it in the slot and tighten away!

Tip 3:  A penny can prevent corrosion on your car battery.  Place a penny by the terminals and corrosion will gather on the penny, not the battery.

Tip 4:    Any of these coins will come in handy if you have a wobbly table, either slip a coin under a foot on the table, or wedge it into the joint that’s causing the wobble in the first place.

Tip 5:     Spare change can help you sew a button too.  Place the coin on the underside of the fabric and line it up with the holes on your button, this will give you a handy guide so that you can easily find the holes in the button and you won’t prick your fingers!

Tip 6:     Fill an old bottle or decorative tin with coins and it makes a great doorstop or bookend.

Tip 7:      If all you’ve got are bills, you can put those to use too, did you know that a dollar bill is almost six inches long.  Remember that and you’ll have a handy measuring device in a pinch.

Some spare tips for spare change!  I’m Mrs. Fixit and it’s just that simple! 

Cleaning Woodwork


Just about everybody has some type of molding or wood working in their home, and more often than not they get grimy and dusty and they’re usually forgotten during those weekly chores. Well I can help.

Tip 1:     First step, a cleaner.  I use a quarter cup of white vinegar to a gallon of warm water.  Pour it into a spray bottle and you’re good to go!  This mixture is great for cleaning painted and stained wood.

Tip 2:     My favorite cleaning tool for cleaning woodworking is a fuzzy carwash mitt.  It covers wide areas and you can use your fingers to push it into corners and crevices.  You can also use a paint brush or a baby hair brush as a cleaning tool.  The paint brush will work especially well when you’re cleaning moldings above your head.

Tip 3:     If you’re worried about getting your surrounding walls wet, use one of my painting tricks.  Hold a squeegee in place at the edge of the woodwork to protect the wall.

Tip 4:   If you have some stubborn scuffs and stains, simply spread some white toothpaste onto an old soft toothbrush, scrub them out of the wall and then follow up with a good cleaning.  You can also use some baking soda on a damp cloth.

Just some easy ways to give your woodwork and molding that much needed TLC. I’m Mrs. Fixit and its just that simple!

Painting Plastic


Whether you picked it up at a yard sale or it’s just seen better days, plastic furniture and kids toys can get new life with plastic paint!

Step 1:        Hose the furniture down.  Add a squirt or two of dish soap and a half a cup of ammonia to a bucket of warm water. Scrub furniture with the ammonia mixture and then rinse it well.

Step 2:        When the piece has dried, set up a painting station.  I like to hang a tarp from a wall or fence. Let it drape down to the ground. Depending upon the size of the piece you may need an additional for the ground.

Step 3:        Now all you need is plastic spray paint, the paint has a special formula that bonds to the plastic without using a primer, there are several brands on the market so just check your local home improvement center.

Step 4:        A couple of thing to remember when you’re spray painting.  Always keep the can upright so it doesn’t clog and keep it moving. If you want to add even more interest to your piece try taping off certain areas with painters tape or contact paper and add different shapes or colors!

Step 5:        Once it’s dried, flip it over and spray the bottom.  You also might want to do a second coat.

 I’m Mrs. Fixit and its just that simple.

Drawer Dilemma


Sticky drawers are often caused by moisture and wear, but occasionally the problem’s deeper and into the joints.  I’ll tell you how to take it apart and rebuild it again.

Step 1:        Pull the drawer out and place it on the floor in front of you, number each piece of the drawer with masking tape.

Step 2:        Once that’s done, disassemble the drawer.  Remove any hardware and carefully pull any offending joints apart. 

Step 3:        If your drawer has dovetail joints, carefully knock the sides away from the front and back so that you don’t damage them.

Step 4:        Once apart, gently sand each joint to remove built up dirt and any remaining glue.  A sanding sponge will help you with this task because it will easily conform to the space you’re working in.

Step 5:        When everything is clean and smooth you’re ready to reassemble the drawer.  Start with the sides, apply a good quality wood glue into the joints and secure them in place with some bar clamps.  Make sure that you check the drawer for square before you let it dry.

Step 6:        Slide the bottom into place and use a few small beads of glue to hold all the joints in place.

Once the glue is dry just slip the drawer back into place.  I’m Mrs. Fixit and its just that simple! 

Painting Formica


If you’re looking for an easy and inexpensive way to spruce up a formica backsplash, try painting it. 

Step 1:        If your back splash has outlets or switches, turn off the power at the circuit box, remove the plates and then seal the openings with some heavy plastic and some painter's tape. Plastic freezer bags work great for this!
Step 2:        Clean the area with hot water and a t-s-p alternative to remove all the dirt and residue. Use rubber gloves and safety glasses, then rinse well.

Step 3:        Use a palm sander to scuff up the surface of the formica with 150-grit sandpaper, then clean away all traces of dust.

Step 4:        Carefully tape off all the areas that you don’t want painted.
the next step is to brush on a coat of bonding primer.  This product will grip the formica and help the paint adhere to the wall.

Step 5:        When the primer coat is completely dry, use a roller or small sponge brush to paint on a good quality latex paint.  You will probably need a couple of coats. 

Step 6:        When the paint is dry follow up with two or three coats of non-yellowing polyurethane.

I don’t recommend this process for formica countertops, because the paint won’t hold up to the wear and tear.  I’m Mrs. fixit and it’s just that simple!

Kitchen Gardening


Look around the kitchen, you may find the perfect fertilizer for your garden or houseplants.

Tip 1:      If your azaleas need some help, mix two tablespoons of white vinegar into a quart of water and use it to feed your flowers. They love the acidic soil!  Because it also has a ton of minerals, you can use white vinegar on your houseplants.  Dilute a tablespoon of vinegar in a gallon of water and you’re all set. 
Use this solution only once every couple weeks! 

Tip 2:      Another great plant fertilizer…coffee.  You can work used coffee grounds into the soil or you can dilute a cup of coffee in four cups of water and use it to water your plants. No coffee? You can use tea or teabags as well!

Tip 3:    Save your eggshells too, crush them up and sprinkle them around your plants. The soft shells will decompose slowly and add nutrients to the soil, plus they repel slugs and snails.

Tip 4:   Sprinkle some cinnamon around the base of your peony plants, to help prevent fungus growth!

Tip 5:    After working in the garden, wet your hands and sprinkle with sugar and wash with soap and water. The sugar acts as a gentle abrasive to scrub your hands clean!

Thinking outside the box when gardening can end up saving you a lot of money!  I’m Mrs. Fixit and its just that simple!

Plate Shelf Project


I have an easy project that makes the classic plate shelf versatile enough for any room!  I’ll give you the basics and then you can adapt it to your needs.

STEP 1:      You need two twelve inch pieces of one by eight poplar, and four twenty four inch pieces, a one by six, a one by four, and a two one by twos. 

STEP 2:      For a basic shelf, make a diagonal cut two inches in from the left and four and half inches up from the bottom on each of the twelve inch pieces.  For a fancier shelf, use a jigsaw to cut a more decorative edge.

STEP 3:      Sand all of the pieces so that you get a nice clean finished product.   

STEP 4:      Dry fit the pieces together, the shorter one by eights are the sides, the one by four is the back, and the one by twos are the front.

STEP 5:      For assembly you can use nails or screws.  Mark all fastener locations; you’ll want two screws on each side to connect the back piece, three along the bottom and one on each side for the front. 

STEP 6:      Then simply assemble the piece.  If you have access to a nail gun you’ll get the piece done in no time, you could even make several to give as gifts!

STEP 7:      Now the finish work.  Fill the nail holes, sand, prime and paint! 

I’m Mrs. fixit and its just that simple!

Repurpose a Table


If you’re getting new dining room or kitchen table, don’t throw away the old one just yet.  Re-use it into your craft or project room!  

A good majority of tables can be separated to accommodate leaves; this is the perfect situation for a project table.  Pull the table apart just about a quarter of an inch and you have a perfect straight cutting line for fabrics, poster board, wrapping paper, you name it!

To make measuring easy, attach a stainless steel yardstick or ruler, depending upon the size of your table, to the top of the table, left of the center cutting line.

How about those old table leaves?  You can use those for storage.  Use large shelf brackets to mount them to the wall for extra shelving.  If you have a laser level it will make short work of hanging shelves.

Fill baskets with all of your crafting, wrapping and sewing supplies, then pop them on the shelf for instant organization!

Easy table repurposing!  I’m Mrs. fixit and its just that simple!


Kitchen Quips


From cooking, to cleaning, to storing, things can get pretty messy in the kitchen.  Well, I have some quick tips to get you back on track!

Dry goods are a pain to store, the bags rip, the boxes don’t line up and things get messy and stale.  The solution; flip top plastic containers. 

Fill them with all of your dry goods, label clearly and revel in how much time and hassle they save.  They line up neatly, they seal tightly so you won’t have pest problems, and the spout makes it easy to fill anything from measuring cups to cereal bowls!

Keep a few pieces of unused non-skid rug padding in your kitchen; it is invaluable when using your electric mixer because it will keep the bowl from traveling across the counter or spinning when you turn on the mixer!  This will also work well to keep your cutting boards from sliding around!

Fill an old salt shaker with baking soda and put it in the produce drawer of your refrigerator.  The shaker won’t take up as much room as a whole box and it will keep moisture to a minimum which will make your veggies last longer!  No salt shaker?  Just put a few paper towels in there to help keep moisture in check, just remember to change them every week or so.  I’m Mrs. FIXIT and it’s just that simple!

Tuesday, February 5, 2013

A Big Thank You! To Exit More Realty in Watertown, NY

Thank you to Exit More Realty in Watertown, NY for sponsoring Mrs. FIXIT on 7  News This Morning!!!  Good to have you as part of the FIXIT Family!

What's on your To Do?

Do you feel like your to do list gets longer with every passing moment?  I know the feeling.  This year I am trying to tackle a project everyday - whether it's the junk drawer in the kitchen, or a kid's closet or my desk.  Even the smallest project can be a big accomplishment, and spur you onto the next "to do"!!!  What's on your to do?